DIEFFEMATIC stands out in the automation systems production landscape thanks to a wide range of solutions that include sliding and swing gates.
These systems are specially designed to meet security and comfort needs in both residential and industrial settings, ensuring functionality and reliability.
MAIN FEATURES OF KV6
- Irreversible electromechanical gearmotor with fully metal gears.
- Sturdy body in painted die-cast aluminum and ABS protective cover.
- Innovative mechanical limit switch system for high precision positioning.
- Suitable for snowy environments thanks to the contactless design between limit switch and rack.
- Manual key release for emergency operations without electrical power.
- Control equipment with built-in radio receiver for effective remote control.
Here is the direct link to the KV6 kit: https://dieffematic.com/products/kit-kv6-230v-automazione-cancello-automatico-apricancello-scorrevole-automatismo
CHOICE AND INSTALLATION CRITERIA
Choosing the automatic gate requires a precise assessment:
- Size, weight, and frequency of use.
- Type of use (residential, condominium, intensive).
- Safety requirements, including photocells and edges.
COMPOSITION OF THE KIT
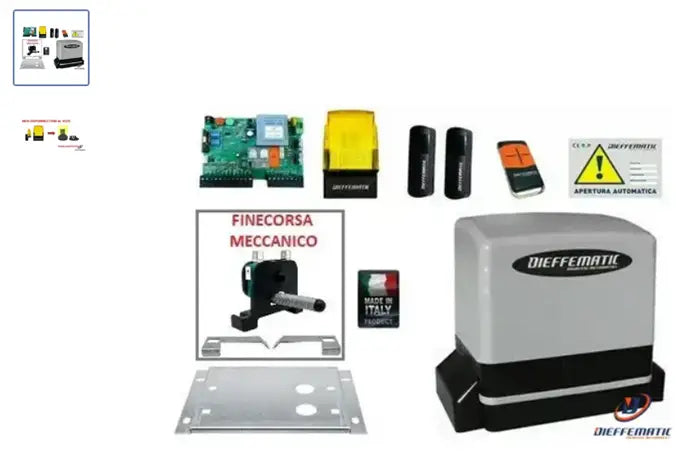
The standard KV6 kit includes:
- 600 kg electromechanical gearmotor.
- Control unit EKOS 230 M1 with force regulation and obstacle detection.
- Single-channel radio receiver and antenna
- 4-channel Rolling Code remote control for a secure control.
- Pair of wall-mounted photocells for obstacle detection.
- LED 230V blinking light for visual signals.
- Complete accessories for installation, including detailed instructions (link to accessories: https://dieffematic.com/collections/telecomandi-e-accessori)

MECHANICAL INSTALLATION
The phases of mechanical installation include:
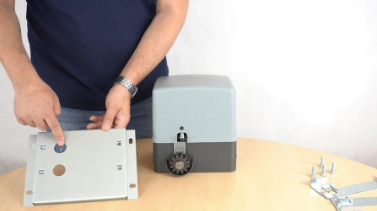
- Fixing the counter plate to the ground.
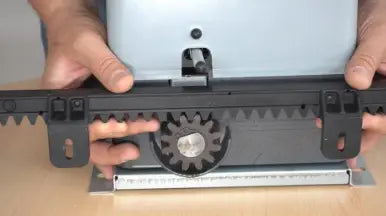
- Mounting the motor and rack, maintaining adequate space to avoid friction.
Here is the link to the manual: https://cdn.shopify.com/s/files/1/0574/2601/8495/files/KV6.pdf


ELECTRONIC INSTALLATION
During the electronic installation, carefully follow the following procedures.
Initial Wiring
Connect the start contact, the common contact, and the pedestrian contact according to the provided instructions.
Connection Terminals
Connect the control devices to the designated terminals on the control unit:
- Terminals 1 and 2 for key, selector, or start button.
- Terminals 2 and 3 for pedestrian passage.
- Terminals 4, 5, 6, and 7 for photocells and other safety devices.
- Terminals 11 and 12 for supplying additional devices.
- Terminals for connecting the motor, courtesy light, and blinking light.
- Terminals for general power supply and ground.
Dip Switch
Configure the dip switches according to the specific requirements:
- Dip 1 (sliding gate use): Off.
- Dip 2 (automatic closing): enable/disable selection.
- Dip 3 (condominium or step-by-step mode).
- Dip 4 (left/right motor position), inverts the motor phases.
- Dip 5-7 (safety control: photocells, mechanical edge, slowing down).
- Dip 8 (encoder enable).
- Dip 9-10 (advanced configuration for optimized and specific operation).
Link to the manual: https://cdn.shopify.com/s/files/1/0574/2601/8495/files/Euro230m1_ECO_it_REV2_deb54617-1596-4571-af08-f22eb3791ba7.pdf?v=1708443595
CONCLUSIONS
The KV6 sliding gate is an advanced solution for those seeking reliability, security, and ease of use.
Integrable into any environment, it guarantees high performance and long duration, with continuous support thanks to clear assembly instructions and after-sales assistance.
With its robust design, advanced safety features, and easy installation, the KV6 is the ideal choice to modernize residential or industrial access.
Visit our website and don't miss this opportunity!

